Making progress in Louisiana

A bill signed by Louisiana Governor John Bel Edwards took effect August 1st making a step forward in marijuana legalization in Louisiana. The new law decriminalizes small amounts of cannabis possession for personal use.

Getting caught with 14 grams or less can now get you charged with a misdemeanor rather than a felony. You’ll face up to a $100 fine without jail time.

Governor Edwards also signed a bill allowing medical cannabis patients to legally smoke whole-plant marijuana flower (instead of the previous medical program that only allowed vaporizing cannabis via a “metered-dose inhaler.”

“Son of a gun, we’re gonna have big fun, on the Bayou!”

Pandemic Gardening Marijuana

If you’re looking for a way to destress and increase your mental health, start a garden – grow marijuana!

Even before your pot is ready to harvest, dry and smoke, you’ll gain plenty of benefits from the growing process.
Many people find comfort and relaxation in taking care of plants. Tending to plants typically has a calming effect and brings certainly and stability.

A quick search of Psychology Today for gardening shows lots of scientific evidence to support this.
Psychology Today: search gardening

Or do a Google search for Pandemic Gardening.


“There are certain, very stabilizing forces in gardening that can ground us when we are feeling shaky, uncertain, terrified really. It’s these predictable outcomes, predictable rhythms of the garden that are very comforting right now… Let’s remember plants are non-judgmental. Plants are ready to respond to anybody, starting today. -Rutgers University professor Joel Flagler”

And once your marijuana has been harvested and dried, you’ll get another reward of calm and relaxation, along with a sense of accomplishment. Priceless in these troubling times.

That, along with the other benefits makes it even more imperative to get started, if you’ve been considering growing your own marijuana.

‘It’s a wonderful time to be a home gardener, because you’re home.’ —Gay Austin, National Garden Clubs president

Have you started or are you ready to start Pandemic Gardening Marijuana? Comment below!

Clone Wars: Starting marijuana plants from cuttings

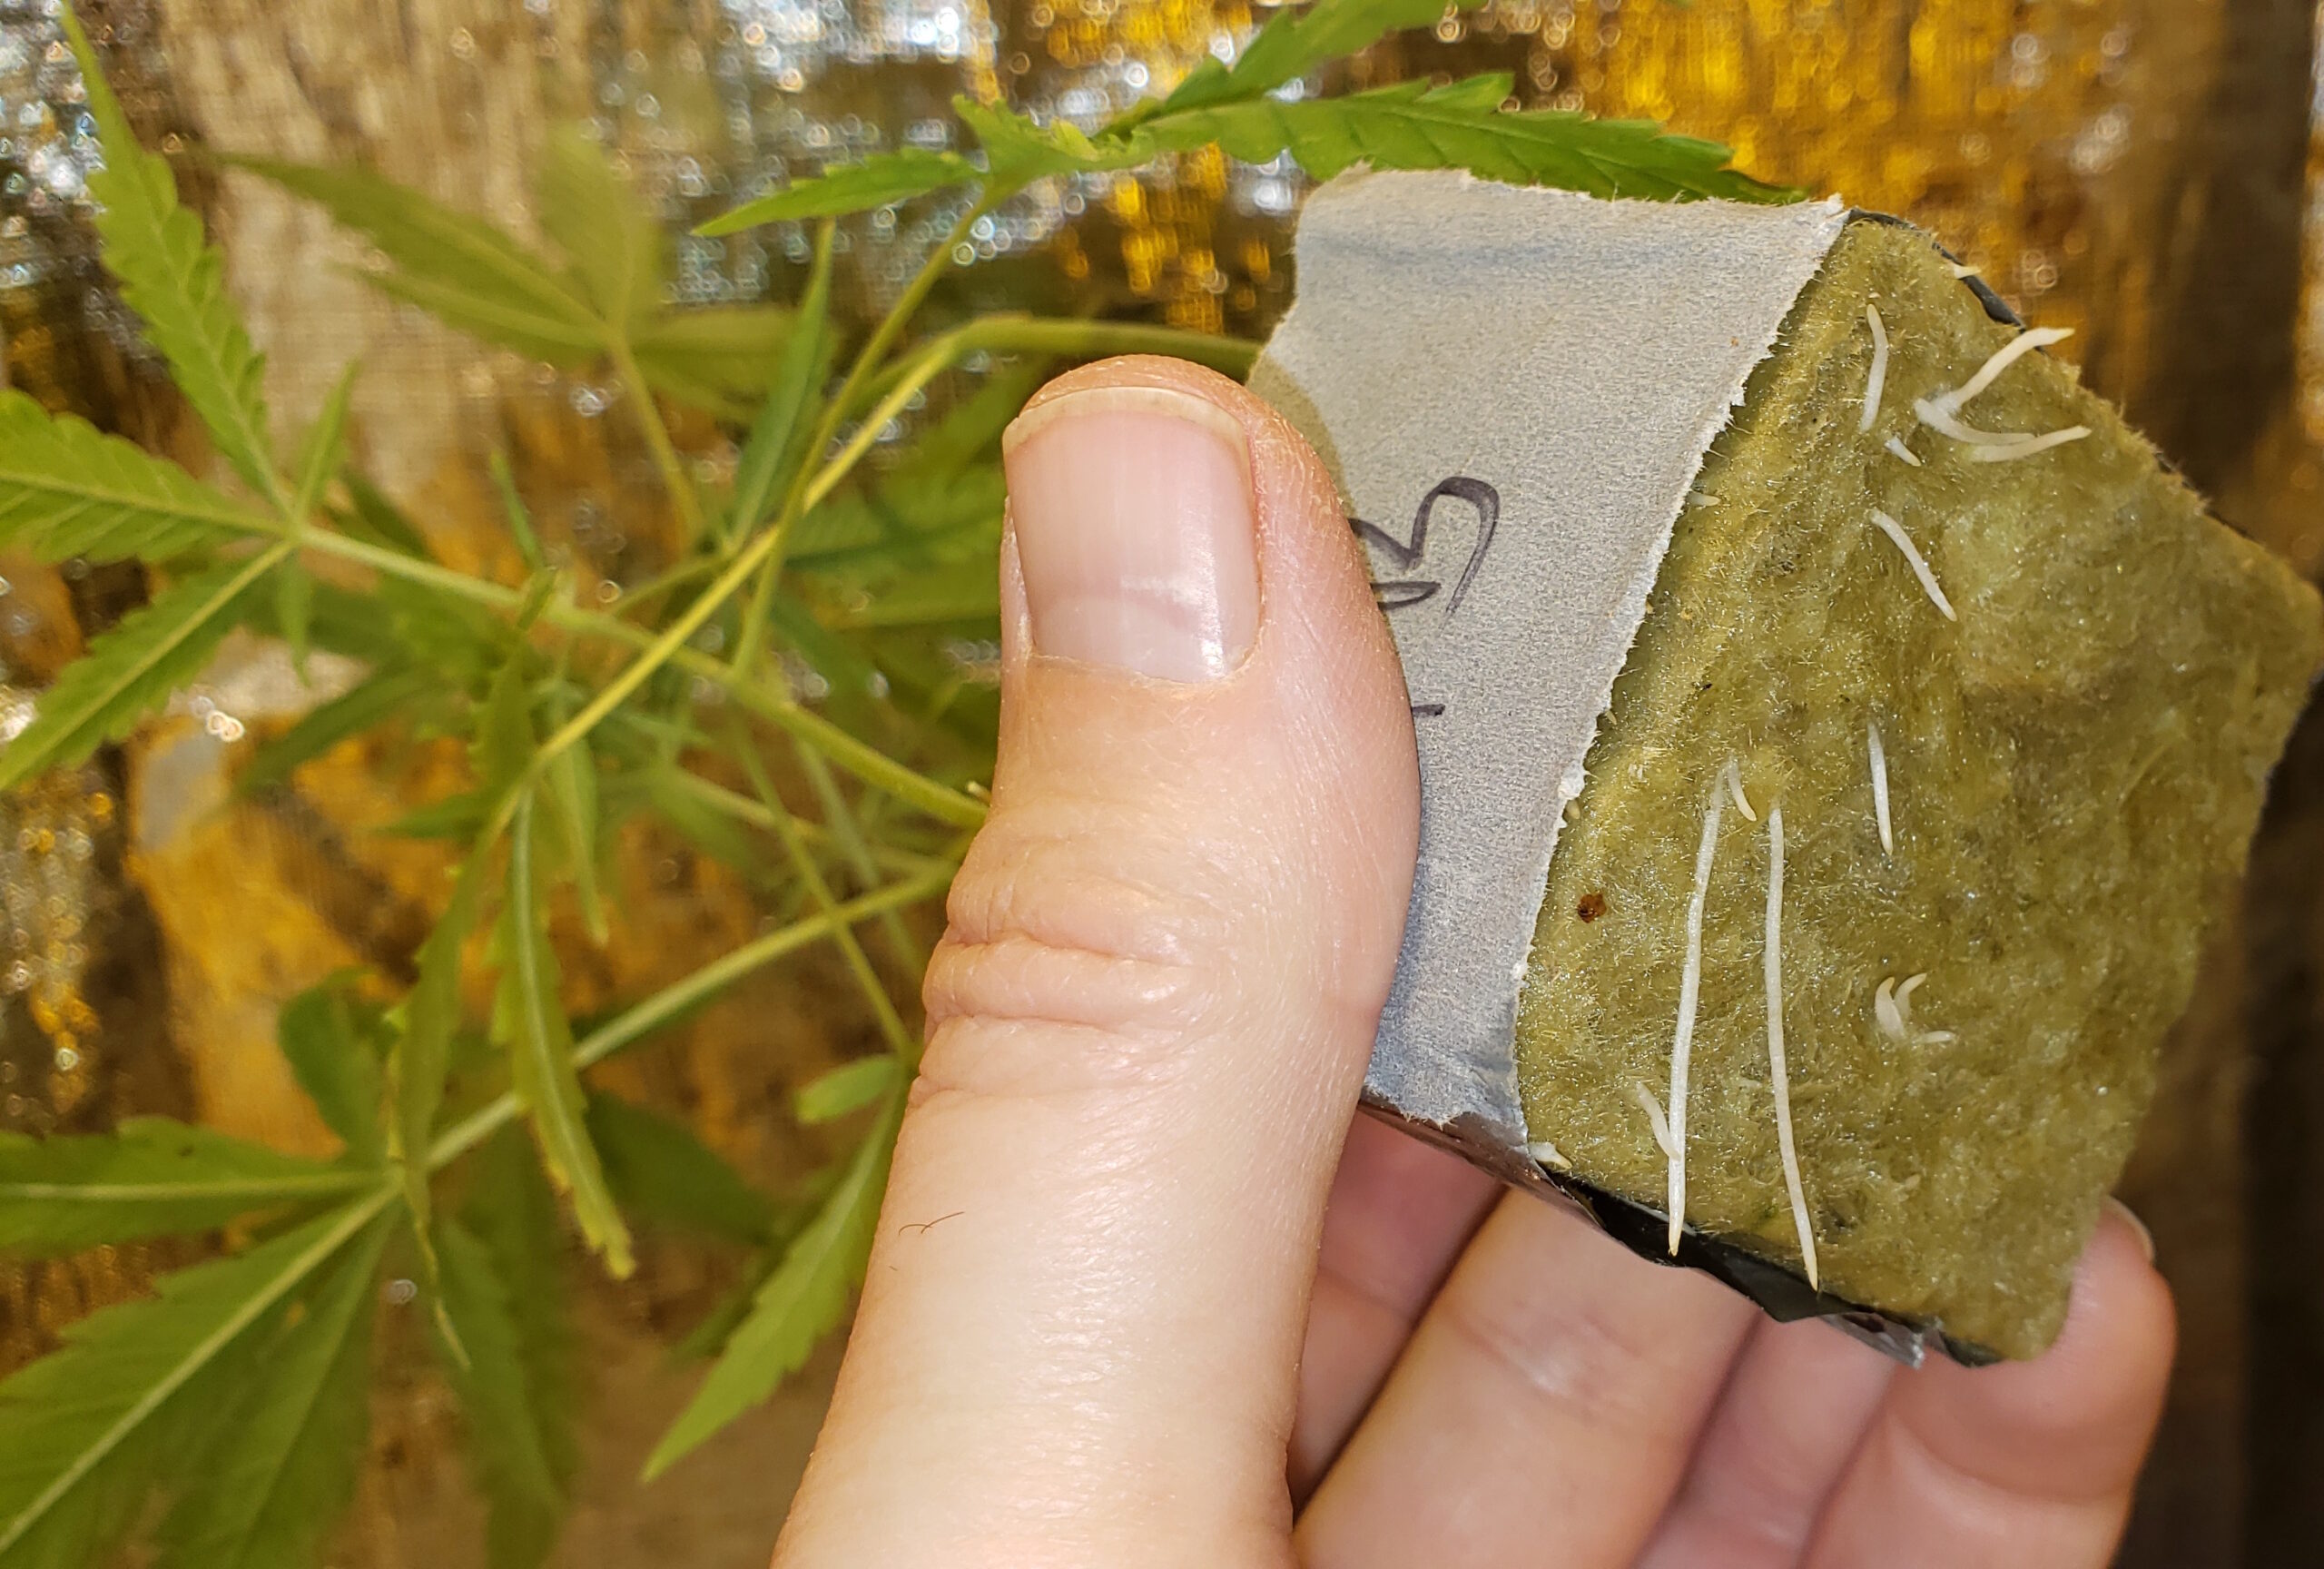
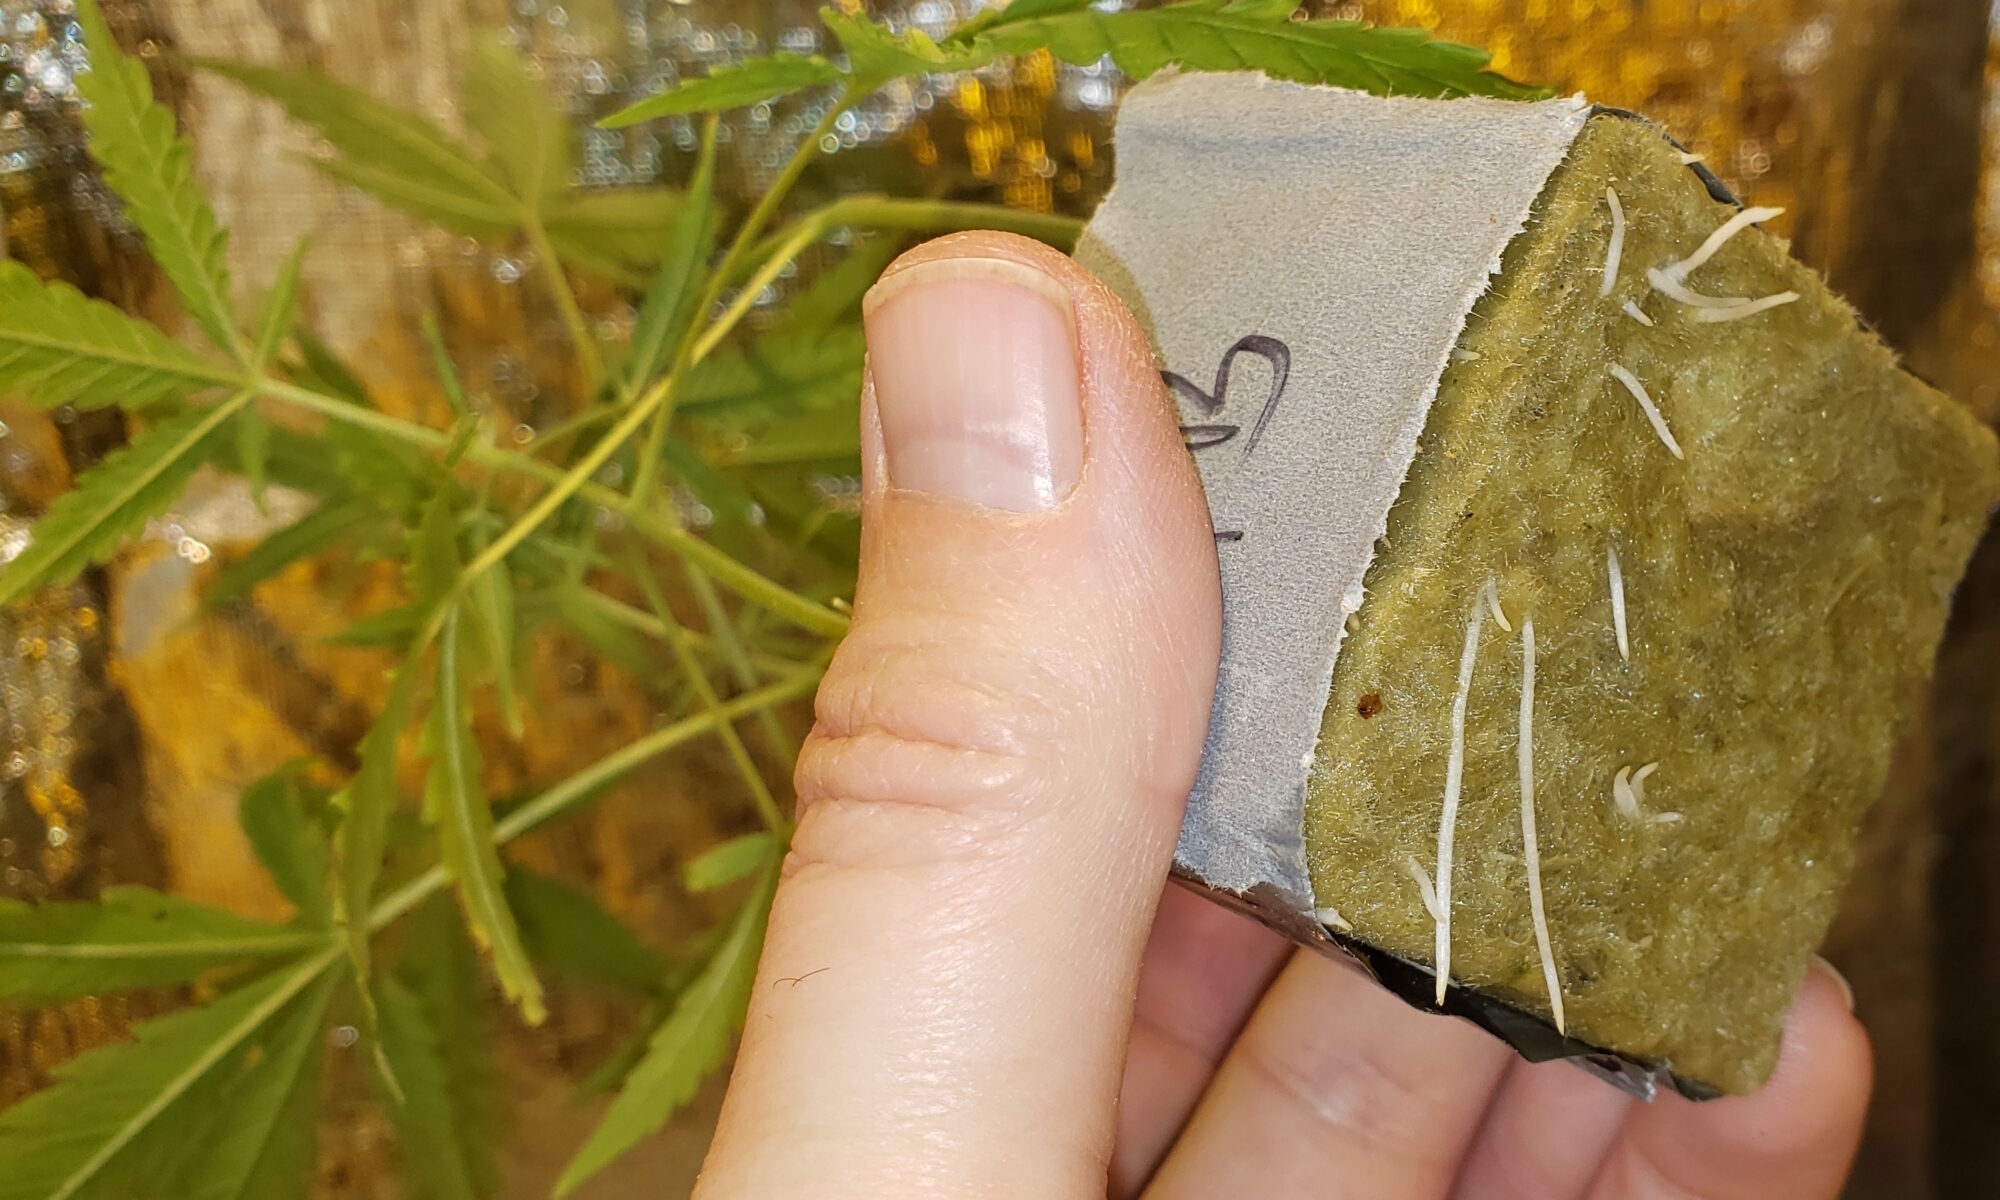
marijuana clone with roots

If you already have a well developed marijuana plant (or a friend who does), taking cuttings from it (cloning) is the quickest way to get new plants going. The clones will have identical genetics to the “mother” the cuttings came from. Cloning marijuana plants gets you a head start – for the same amount of time, clones are way ahead of plants started from seeds.

Items you need for cloning marijuana plants:

  • Plant big enough to have branches cut off (we like to take clone cuttings as part of the pruning process right before putting a plant into bloom (12 hours of light, 12 hours of dark). You can take cuttings after a plant has been in bloom for a while, but the longer the mother has been in bloom, the longer the new clones will take to root and get back into “vegetative growth”.
  • Clean, sharp knife, razor blade or scissors
  • Rock wool block (or other, similar “rooting plug”)
  • Distilled water (or water that has been pH adjusted to around 6).
  • Rooting hormone powder or gel (optional but recommended)
  • Humidity dome or plastic bag (optional but helpful in dry environments – around 70% humidity is ideal)
  • Heat mat (optional but helpful in cooler environments, probably not needed if the air temperature is high 60’s F. 70 to 75 degrees F is ideal)

Steps to cloning marijuana plants:

  1. Soak a rock wool block in distilled water and place on a plate or tray (no not squeeze the water out as that will damage the rock wool).
  2. Choose a branch towards the bottom of the plant, and using the sharp blade, cut 45 degree angle near base of the branch. We like our clones to be 5 to 8 inches when cut.
  3. Scrape a bit of the outside skin or “bark” off the branch’s stem near the cut.
  4. Dip the 1/2” of the cut end of the branch into the rooting hormone powder or gel.
  5. Gently push the cut end of the branch into the rock wool block (we don’t use the hole in the block, if it has one). Push it most of the way through but not poking out the bottom, if you can. Don’t forget to label the cutting, if you’re taking more than one variety (strain).
  6. It’s possible to put more than one cutting into one block (the block can be torn into pieces to separate the plants after they have successfully grown roots – but you’ll have to be careful not to damage the roots when pulling or cutting the rock wool blocks apart).
  7. If the branch has branches, you can trim off the small branches. Also, it it has a lot of leaves, you can trim back some near the cut. Some people like to also cut the tips off of big leaves but we don’t bother.
  8. It’s best to take more cuttings than you think you will need (in case they don’t all survive). If they all survive and root successfully, give extra clones to your friends to help them get started.
  9. In dry conditions, place a dome over the cuttings to keep them from drying out too quickly. In warm, humid weather, we don’t put any sort of cover or humidity dome over the clones, or they may be too wet and grow mold.
  10. Put under shade or indirect light, especially for the first few days. In cooler conditions, you may want to place a heating mat (intended for starting seedlings in cool environments) under the tray.
  11. You can pick up the rock wool block every other day or so to check if it needs distilled water added (if it feels light like a dry block add water). You can also mist the leaves with a water sprayer if you like.
  12. Under ideal conditions, roots will start to grow out through the bottom of the block in about a week. Don’t worry if it takes longer (2-3 weeks can be common for some strains under some conditions). Be patient and keep waiting as long as the cutting still appears to be healthy.
  13. Once the roots start showing out of the bottom of the block, you can mix some nutrients into the distilled water you add to the blocks (we like mixing the nutrients “half strength”, or twice as much water to powder, as the nutrient’s directions indicate.
  14. Cloning marijuana plants - roots showing

  15. Once the roots abundantly grow out of the bottom of the block, it’s ready to be transplanted into a growing container, such as a deep water culture hydroponics bucket. (Blog post coming soon).

Click here for a great video that is not exactly how we do it and not quite as simple as we like to keep it. But similar enough to be a very good guide. Its especially great for showing how to select which branches to cut for the clones. Guide to cloning marijuana plants (on YouTube)

2020 Election Results are in – Marijuana legalization wins big!

Congratulations are in order to the voters who have gained the freedoms they want and deserve!

  • All marijuana legalization initiatives on ballots in the November 3rd, 2020 election passed by a wide margin.

Mississippi voters legalized medical marijuana. So did the voters of South Dakota, who at the same time legalized recreational marijuana along with Arizona, Montana and New Jersey! The states’ legislatures still need to work out many of the details, things like whether home growing is allowed. But any form of legalization is certainly a step in the right direction.

  • This brings the number of states with legalized medical marijuana up to 34 and the states with legalized recreational marijuana up to 15 (plus Washington DC).

Let’s hear it for grass roots movements!
Grass roots movements

Regardless of what else comes from this election, we think today is a good day to celebrate with some herb!

Leave a comment below to shout out congratulations to those winners this election season!

This time, it may have only been five states, but it goes to show, its just a matter of time, marijuana legalization is coming to your state too!

On that note… Pennsylvania‘s governor Tom Wolf has once again called on the state’s legislature to legalize recreational marijuana (October 13, 2020). Way to go Tom! Perhaps Pennsylvania will be the next state to legalize. Wouldn’t it be refreshing if a state legislature made laws that follow what the people want, instead of forcing the people to bring on the change themselves with ballot measures?

Marijuana legalization has been moving pretty quickly here in North America.
Look up your state’s legalization details here.
But don’t forget, we still have a lot of work to do. If you’re involved with furthering marijuana legalization in your state or district, please let others know how they can help – comment below!

Starting marijuana plants from seed…


When you’re ready to jump in, you’ll need a plant.

How you get that plant will be determined by what you have available to you. Focus on what you have on hand.

The easiest way to start is with “clone” or rooted cutting.

If you can, we recommend starting with a “clone” or cutting of a good female plant. Friends who already have been growing for even a short time can often help with this. A cutting can take around 2 weeks to get well developed roots, but once rooted will be far ahead of a seedling started at the same time as the clone was cut. We like to root cuttings in the same rock wool blocks we use for starting seeds. Upcoming blog post about rooting cuttings…

We often end up with more successful clones than we need (we always start more than we’ll need in case some don’t root successfully). When they all root, we end up with extras that we like to pass on to help get others going. We will soon post a blog about starting your own clones.

But if that’s not an option, starting marijuana plants from seed is the next best thing.


First get the seed. Depending on what’s available to you,

  • A. Get a seed from a friend.
  • B. You can grow seeds you find in marijuana. You may not be able to tell if the seedling is male or female until it starts to bloom (you don’t want male plants unless you are attempting to breed new strains of marijuana, that’s an advanced topic). But if you have these seeds, don’t be afraid to try them. You can start twice as many as you will need, then remove the male plants – generally half will be male.
  • C. Purchase a seed from a seed bank. This costs more than other options but gives you more control.
    • You can select the “strain” or genetic ancestry of the seeds. You get to choose the characteristics you’re looking for. For example, growing characteristics, like short blooming period, medium sized plant, easy to grow (tolerant of varying growing conditions). Or characteristics of the buds produced: for example: high THC content (the psycho-active chemical that gets you high), high CBD content (the chemical known for relaxation and reducing inflammation), and other characteristics like ability to reduce pain, likelihood to cause increase in appetite, flavors detected. Web sites like https://www.leafly.com can be helpful in determining the characteristics and strains you are looking for.
    • We recommend selecting “feminized” seeds – ensuring that the plant is female. This lets you avoid the 50/50 chance of starting a male plant, only to have to start all over again after waiting until the plant starts the blooming cycle). Although the feminized seeds typically cost twice as much as non feminized seeds, in our opinion, it’s worth it.
    • Some varieties also have “auto flowering” seeds – the plants will start their blooming cycle based on the plant’s age, not the light cycle (12/12). This means you don’t have to worry about starting the blooming cycle by changing the on/off time of your lights. This does simplify things, though we prefer to have more control of when blooming cycle starts: we start the bloom cycle when the plant is the size we want ti to be.
    • Many seed banks will allow you to buy just one seed but will often give a discount on multiple seeds.
    • A google search for best seed bank will give you a number of articles covering numerous seed banks.
    • If you don’t what know strain to choose, we have found Gorilla Glue to be fast and easy to grow and really good quality. Great for beginners.
    • We’ve had good service from https://www.seed-city.com

Items needed:

  • 1 seed
  • Distilled water (a gallon from the grocery is fine)
  • A “rock wool” block These are what we use. Buy here…
    We like to use 2″ rock wool blocks for (starting marijuana plants from seed as well as for cloning), with the grey plastic wrapped around the sides to keep in moisture and prevent roots from crossing to other blocks. You can use other seedling starters like peat pellets. Even dirt, though if you do, you’ll probably want to clean as much dirt off the roots as possible, if transplanting into a hydroponics system. If you use smaller blocks, and/or without the plastic around the sides of the block, you’ll need to be more careful not to let them dry out too much.
  • Small tray or plate to keep under the rock wool block.

Steps:

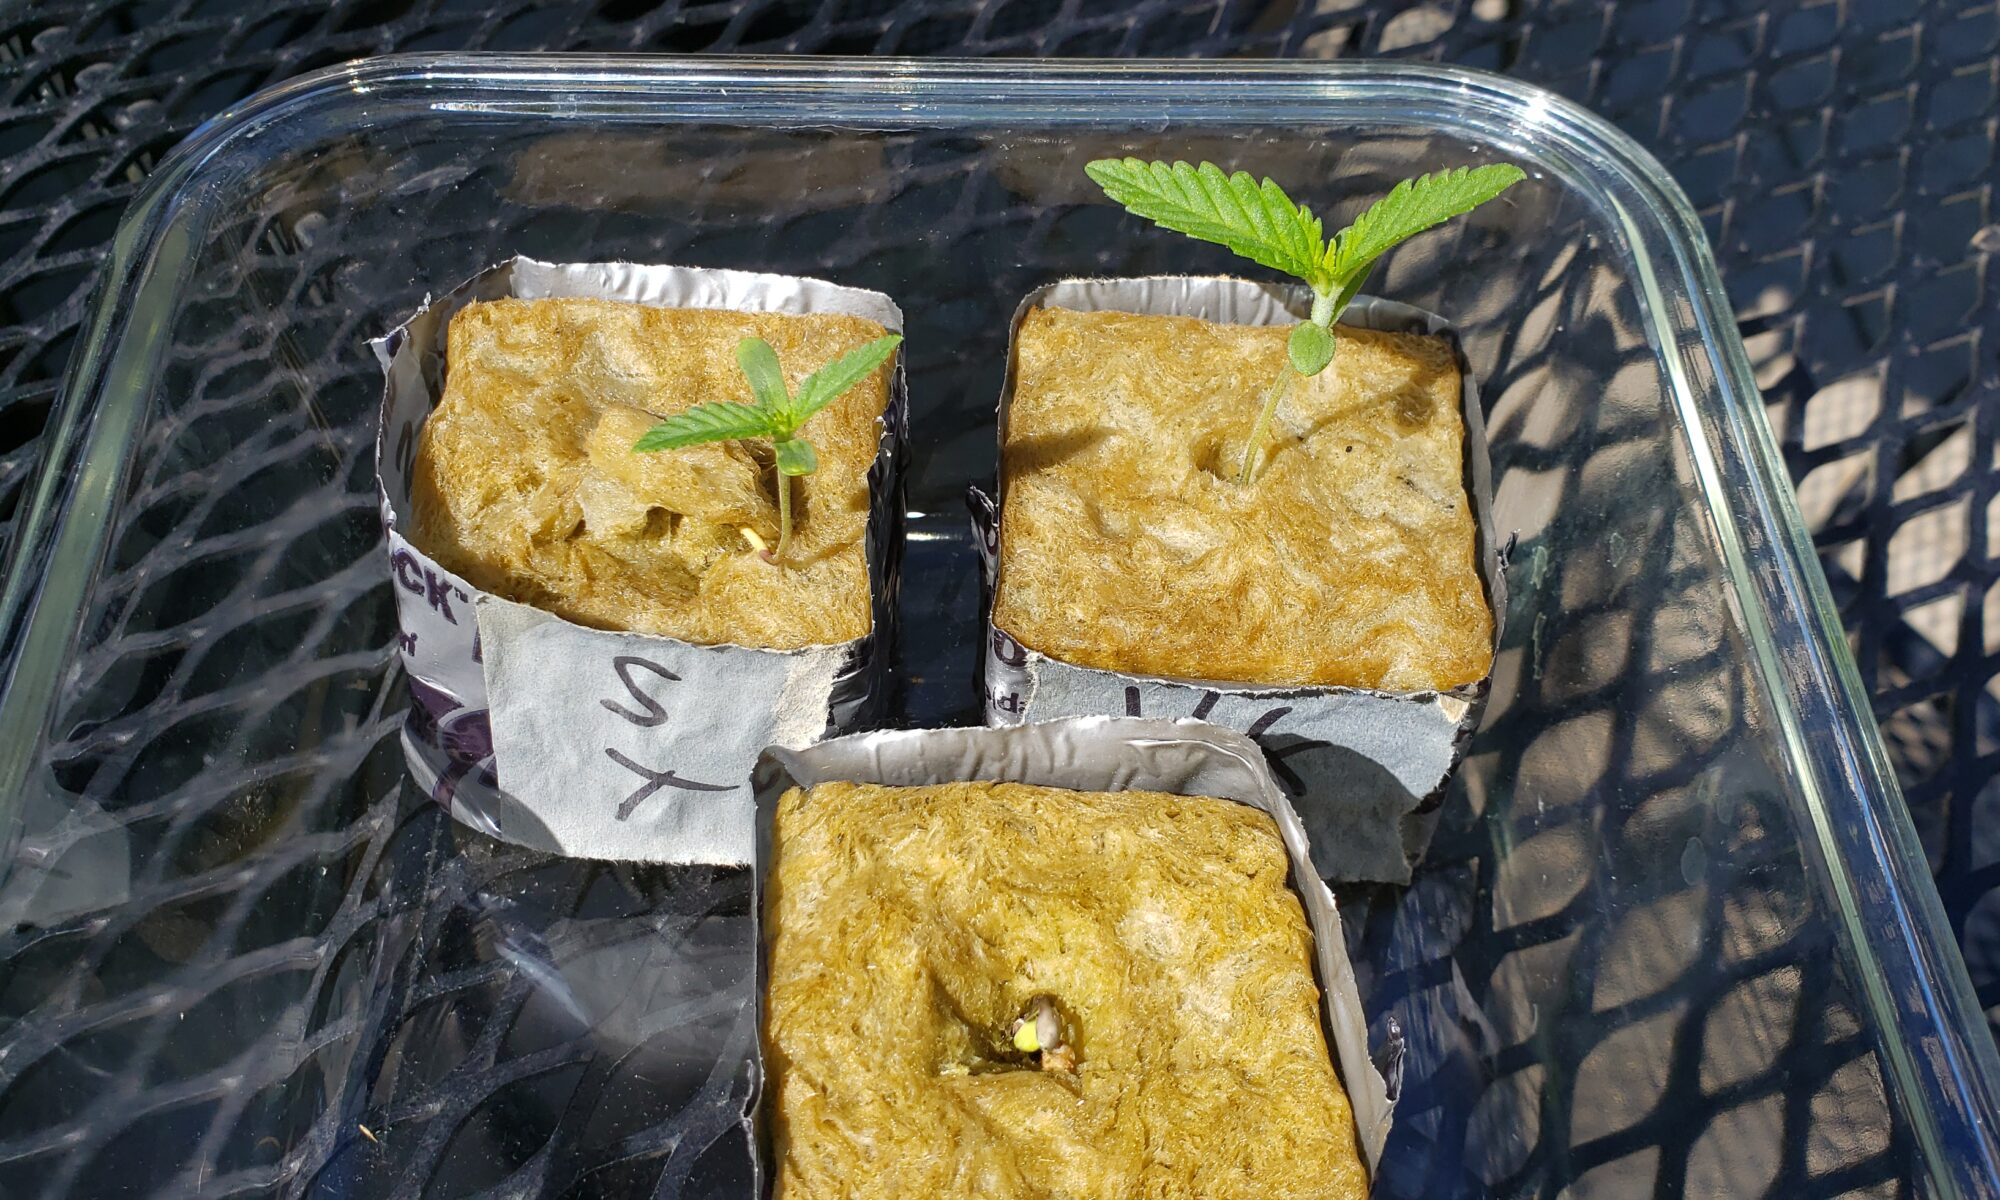
  1. Soak the rock wool block in the distilled water…
    Leave the plastic sleeve around the block if it comes with one, but tear the paper connectors to separate out the blocks you are using. After soaking, shake it little to get a bit of water out. Be careful not to squeeze and crush the block. It will hold enough water to sustain a seed for several days. The rock wool blocks may suggest soaking them in water adjusted to be slightly acidic (pH around 6). But we’ve had good results from just using distilled water from the grocery. Just using our tap water has yielded poor results (our tap water is from a well and is somewhat alkaline, around 8 and seedlings do not like it.
  2. Place seed in the block (make a small hole, if the block doesn’t already have one…
    If the block has a hole, you can drop the seed into the hole. If not, make a small hole in the block,
    1/4 to 1/2 an inch deep (a pencil is about the right diameter). Some people to tear a bit of the rock wool off a corner and tuck it into the hole over the seed, though we usually don’t bother. Some people also like to soak the seed in a glass of water or wrapped in a wet paper towel in a plastic baggie in a warm place, overnight. But we haven’t found that to be necessary.
    put seed in block (or in baggies, or glass of distilled water overnight)
  3. Put it in a glass or on a dish in a warm place, a window sill or even on top of a refrigerator. At the very beginning, no light is necessary. After 2 or 3 days, the seed will germinate (or sprout) and then it will require some light. Sunlight is best but even a desk lamp will work.

  4. Every few days, add distilled water to the block as needed.
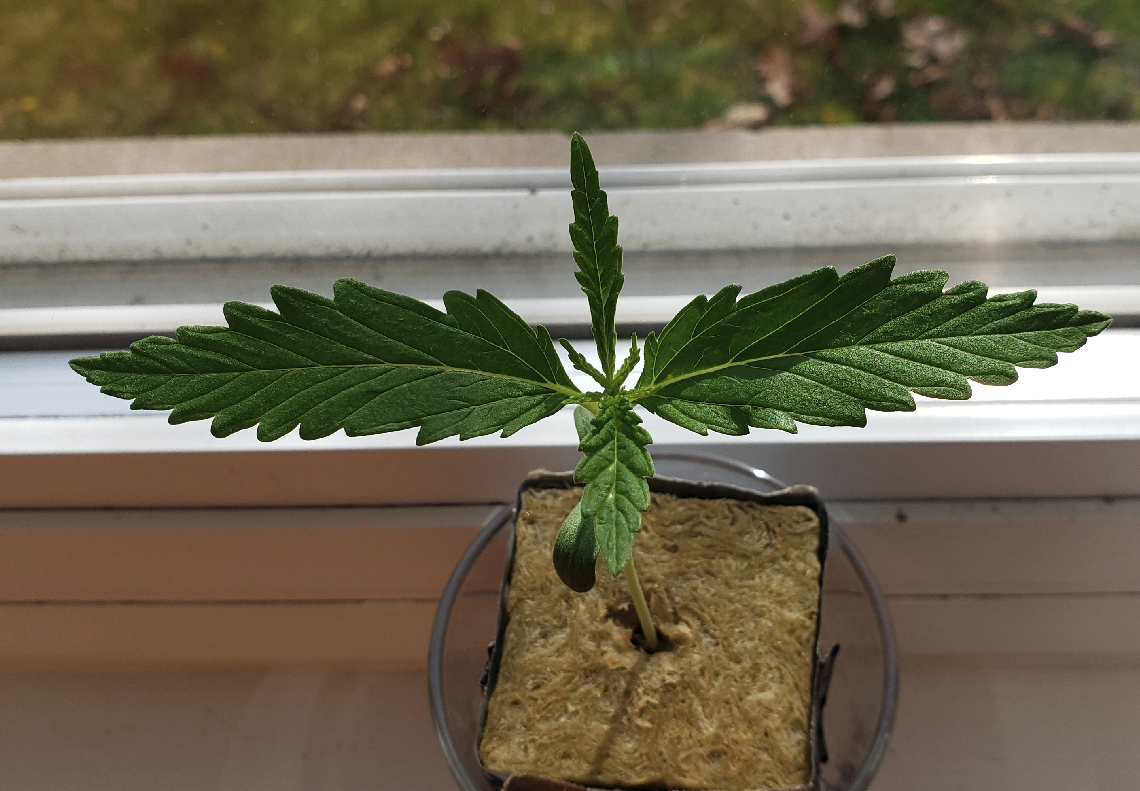
    You don’t want to keep the block soaked, but you don’t want it to completely dry out, either. You can check how much water is in the block by carefully picking it up. If it’s light, like a completely dry block, add some more distilled water. The sprout will push it’s way out of the block and initially will have only two small leaves (these are actually the two halves of the seed). The shell of the seed, and an inner membrane should pop off naturally, but if the sprout gets too tall, two or three inches and the two seed halves haven’t opened up like leaves, you may want to gently help the shell and/or membrane off. You must be careful, as breaking anything at this stage could stop the sprout from growing.
  5. The seedling will soon gain height and will start to grow another set of leaves. Once we see the new set of leaves starting, we start feeding the seedling a bit of nutrition.

    Mixing full strength and distilled water half and half. We do this by making of a gallon of “normal strength” nutrient solution using this:

    We use either Maxi Grow (Buy here…)

    or

    Maxi Bloom (Buy here…) This is optimized for flowering stage, but also works well for growing.

    We mix a teaspoon of the full strength and a teaspoon of distilled water in a small cup, then pour that into the block (you can pour into the top of the block, or pick up the block and hold it upside down and pour into the bottom of the block – the seedling should have enough roots to not fall out of the block. The seedling will tend to lean towards the light source, we like to turn it occasionally so it’s leaning away, so it will turn back towards the light to balance the plant out (normally it will slightly follow the sun as it moves across the sky).


  6. When the roots start to branch out of the bottom of the rock wool block, it’s time to transplant into a growing container.
    We suggest something like “deep water culture” buckets, like this one (Buy here)
    or
    this one (Buy here)


We’ll talk more about this and continuing on from here in another blog post.

Please comment below and let us know if you have questions or if you started your own marijuana from seed!

How to do it – Overview of our process

Our basic, “keep it simple” process.

We will go over each part of this in more detail in upcoming blog posts. Here’s an overview to give you an idea of what’s involved.

1. Get a plant started from either cutting or seed. The plant needs no food or fertilizer at the beginning.

2. After 2-4 weeks, transplant into a hydroponics planter with a diluted nutrient solution. We recommend half as much nutrient in the same amount of water for the first two weeks. You can also increase the strength of light provided (if you’re not using natural sunlight). The light should be on the plant at least 16 hours a day, up to 24 hours.

3. The plant will begin vigorous “vegetative” growth. Every 2 weeks, for the next 1-2 months, (depending on how large you want your plants to get) change out the hydroponics nutrient solution with fresh, “full strength” solution.

4. When the plant is slightly smaller than you want it to be when you harvest it, prune the plant lightly, cutting off smaller, lower branches that won’t get much light. This is a great time to take cuttings/clones for your next grow and to share with your friends.

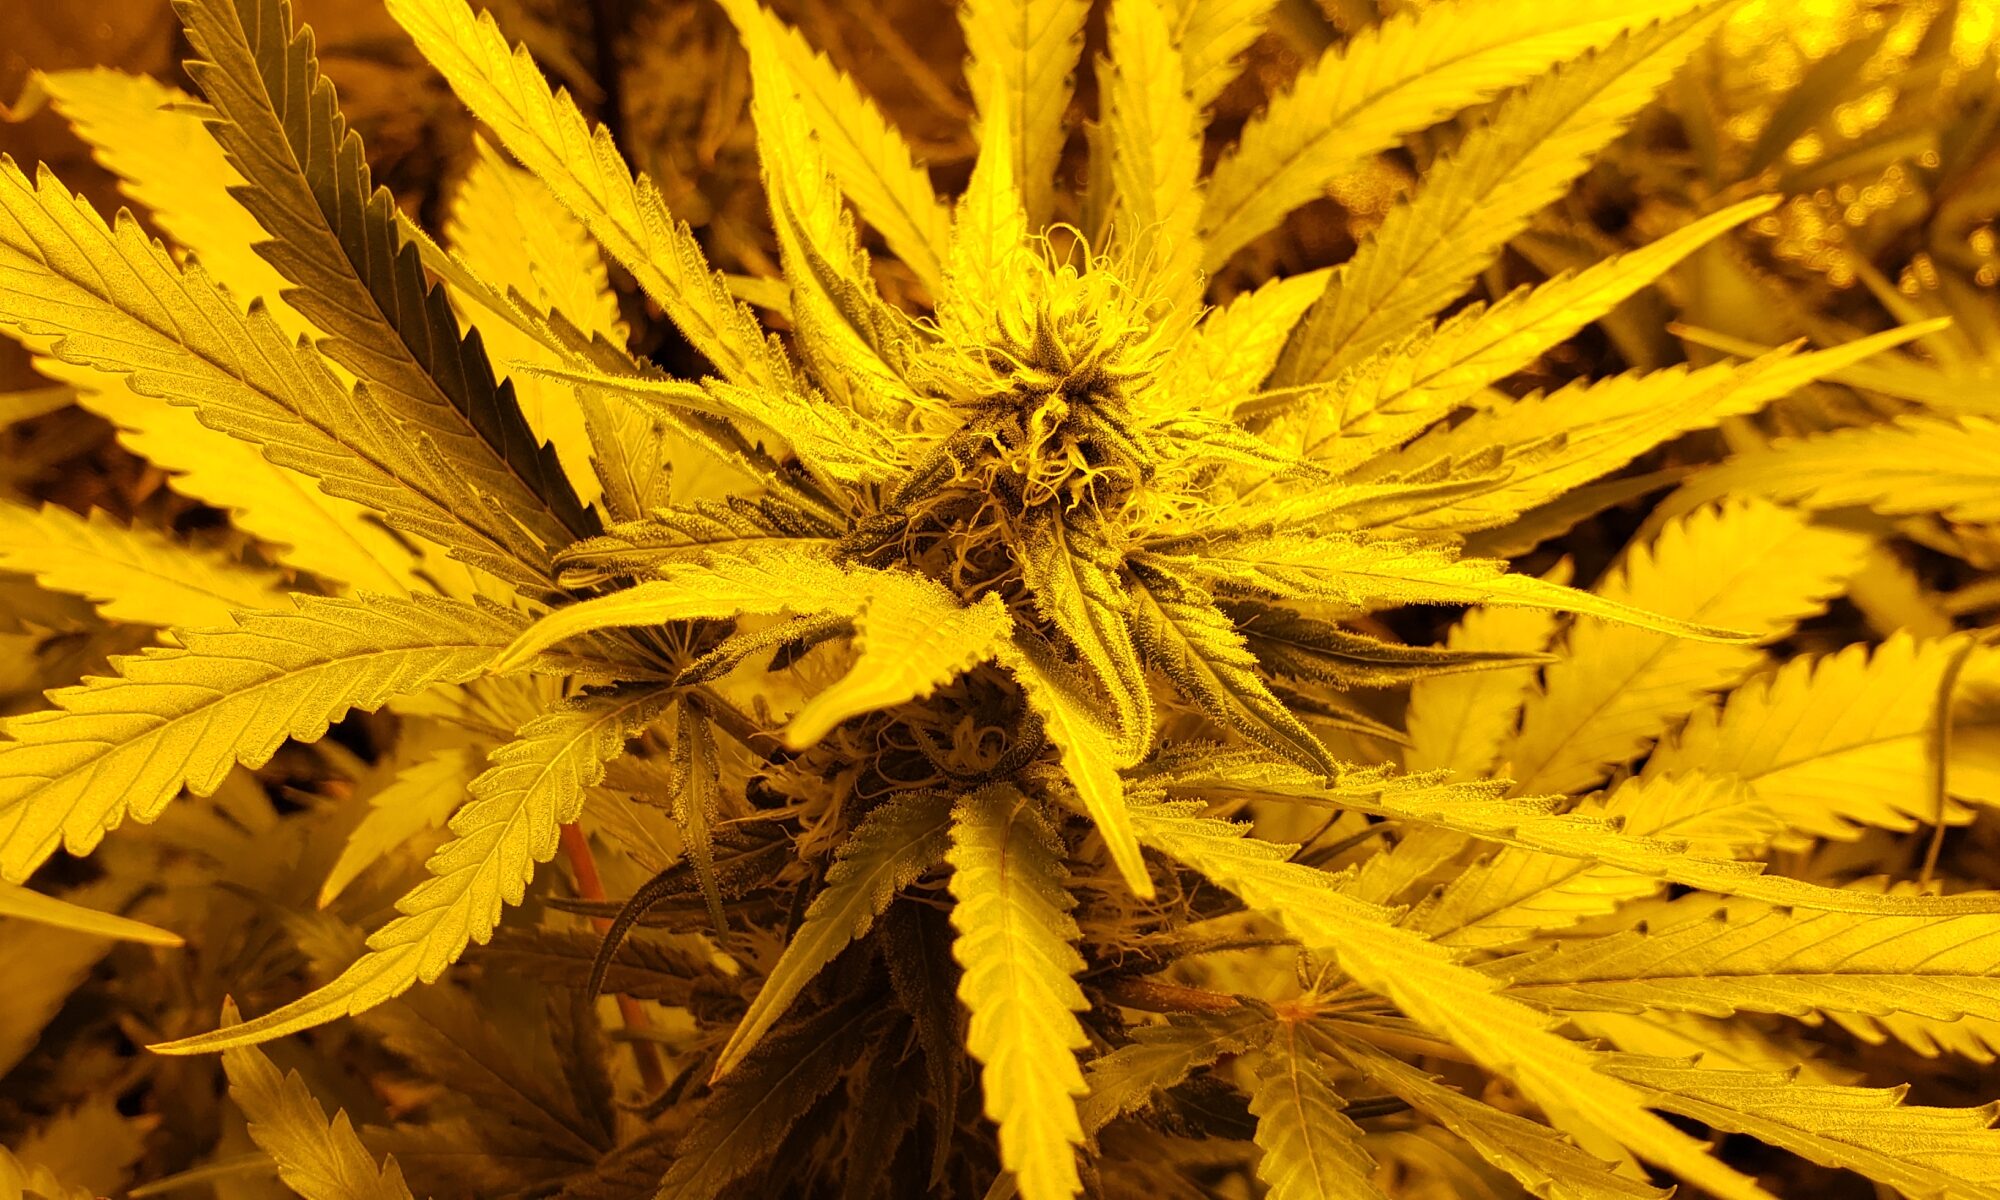
5a. Start the “blooming phase”. After pruning, change the time the plant is in the light to only 12 hours. This signals the plant that it’s time to start flowering/blooming (making the buds and THC). It will continue to grow a little bit more in height as it makes it’s transition to the blooming phase.

5b. Some people prefer to change the kind of light being provided to the plant at this time (a more red/yellow light for blooming). Is that absolutely necessary? We will discuss this in a future blog post.
5c. Some people also prefer to change the nutrients they use at this time, switching to a “blooming nutrient blend” instead of a “vegging” or “growth nutrient blend”. If you want to keep things really simple, we recommend using the same nutrient for both. We’ll discuss this in a future blog post.

6. Every 2 weeks, for the next 1-3 months, (depending on how long your variety takes to bloom), replace the nutrient solution with fresh.

7. As the buds get close to being ready to harvest, their appearance will change. When you notice they are close, you may cut sample buds to try out before the final harvest. “Quick drying” in a microwave oven is a common way to get a sample without the wait.

8. Some believe that it is good to “flush” the nutrients from the plants for a number of days before harvesting. We typically replace the hydroponics solution with plain water 4 days before harvest.

9. Begin cutting branches from the plant. Trim the leaves off the buds and hang them to dry. You don’t have to harvest the plant all at once. We like to cut the top branches first, often leaving the lower branches for a day or two later.

10. Check the dryness of the branches daily after the first couple of days. When the buds feel a bit crispy on the outside and a branch stops being flexible and “snaps” a bit when you bend it, take the buds off and place into jars.

11. Each day, open the jars to let the bud “breathe” a bit – releasing moisture slowly, day by day, allows the buds to “cure”. That is, the chlorophyll can break down by the natural enzymes in the plant. If the buds appear to be wet, and/or smell like hay, you may need to leave the jar open for a longer period of time. Too much moisture sealed in a jar can cause mold to grow.

12. Some claim that proper curing requires up to 6 weeks before smoking the bud. We think you should try your bud as often as you want. See for yourself, whether or not the potency, flavor and high get better the longer it cures.
What is stopping you?

If you haven’t started yet, why not? What is stopping you?

There are lots of reasons people don’t start something they want to do. And we can go over these in more blog posts. Let us know in the comments below if you have something specific you’d like us to discuss.  But today lets talk about one of the most common, it’s one I have struggled with many times…
Perfectionism. 
I know I’ve avoided starting many things due to this (including this blog!).  I’m frequently feeling like I need more time, or to learn more, to purchase more materials I might need, read more books or blog posts, more time to work on my thoughts… etc. etc. before I can get started. It can be never-ending.  
But consider this…  
Plants only need a few things in order to take care of themselves and “do the rest” for us.  Air, water, nutrients, light, a place to anchor their roots and a space that isn’t too hot or too cold.  
Wow, that seems like a lot to deal with!  But remember the “80/20 Rule”.  If you get it 20% right, you’ll end up getting 80% of the results.  Is it difficult to get it better than “20% right”?
Not at all! When we grow indoors, using hydroponics we have complete control of the items on that list.  You can be pretty sloppy and still get better than “20% right”.  We’ll come to these details – how we control these things in an upcoming blog post.   Its really simple.
For now, let me prepare you by saying, I have made mistakes that have killed plants in a few cases.  The biggest area for “accidents” is the beginning. Seedlings can be very weak and fragile. The same for clones/cuttings.  This is also the time when you have the least “invested”. The least money, effort and time (which is the hardest thing to recover – we can’t get time back).  So it’s the easiest time to recover, and start over if we must.  Making mistakes is one of the best ways we learn.  I remember lessons from my mistakes much better than the lessons from books I’ve read.  
 I don’t mean to make it sound scary and difficult to get plants started. But it can be painful to pay $10 for a seed only to have the seedling sprout and die off after a couple days. It happens. And if you must have everything perfect, you’re bound to be disappointed. But if you accept that you don’t have to be perfect, you may need a couple tries to be successful, and you keep at it, you will be successful.  And maybe you can plan for that, first choosing seeds that might produce lower quality bud, but cost $1 instead of $18 a seed (yes, I once accidentally killed an $18 seed, made me very sad, but I learned some lessons that are still with me today).
Once you get past the early stages of the plant’s life, the plant gets much more forgiving and easier to take care of (and much harder to kill).
But it can be hard to get started, when feeling like everything must be done perfectly.  Sometimes I find it helpful to ask myself: “What would I do if it was impossible to fail?”  If I do fail and learn something from it, it’s not a failure, because I’ve learned something from it!
Stick with us, and we’ll guide you through the challenges of getting started. And we’ll share our mistakes with you, so you can avoid many of the “learning experiences” we went through. 
But when a mistake can’t be avoided, view it as a “learning experience” – a lesson that provides valuable information on how you can improve.
It’s OK to not be perfect. Especially when you’re starting out.  We know – we’ve been there!  

Leave a comment below and let us know what is stopping you? and how did you get past it.

Before you start Part 1: FAQ – Frequently Asked Questions


You really need to understand your local and state laws. And follow them. Period.

Don’t assume that because it’s legal in some form in a lot of places, that your local/state authorities won’t come after you if you break their laws.  Some are making a point of going after law breakers to prove the point that it may be legal in some places but not there.  Don’t assume that your local and state authorities have better things to do than go after you for growing a little weed.  Don’t assume that they’ll wait until all the serious malicious crimes have all been solved and prevented before going after those committing “innocent, victimless crimes” like growing marijuana. Seriously.

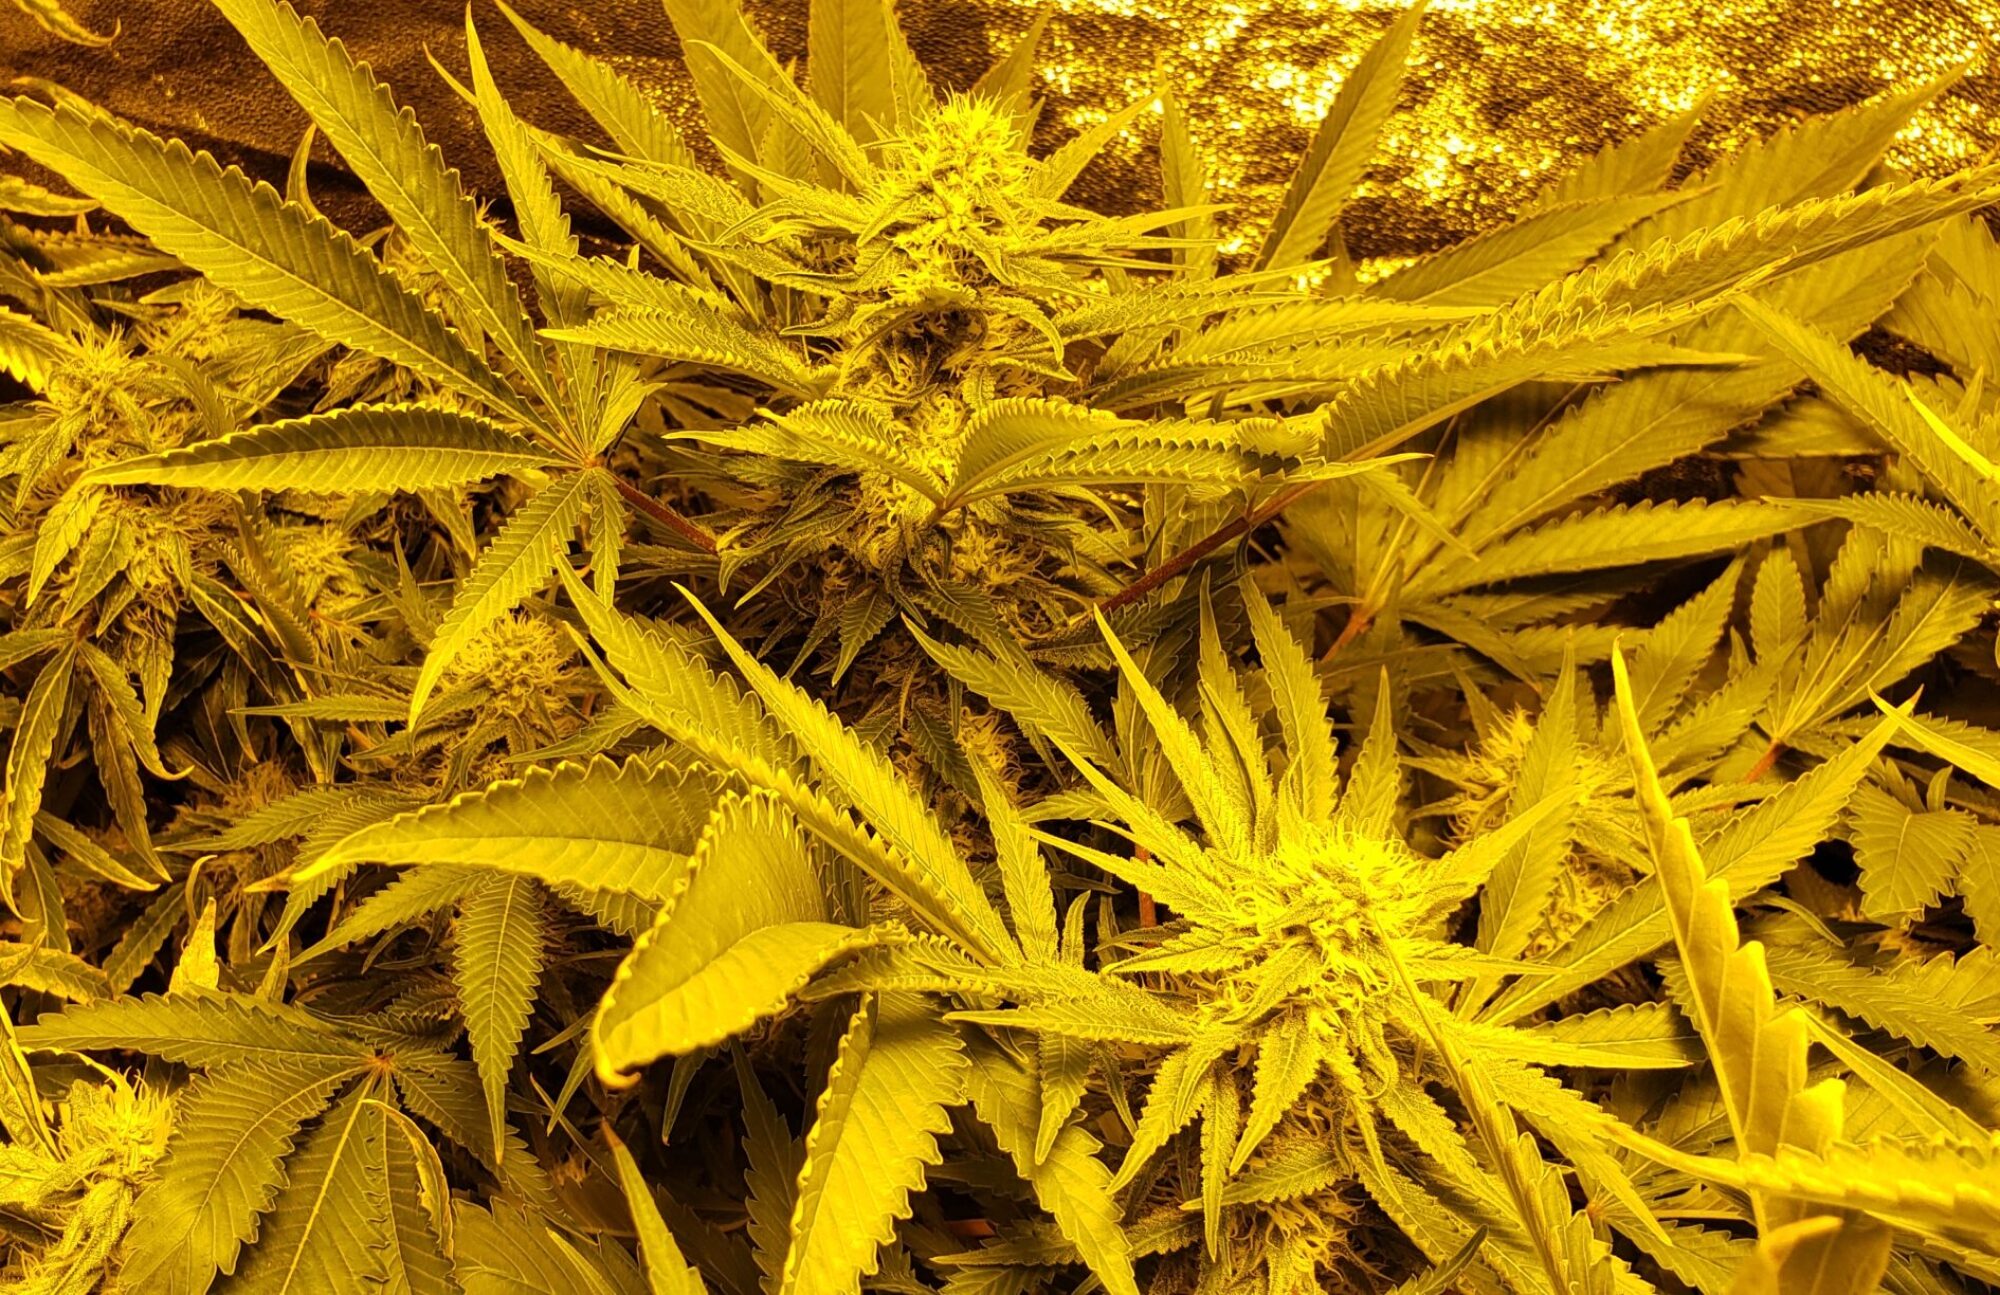
You want dried, female marijuana flowers, also known as bud.

Marijuana plants can have either male flowers, female flowers or both.  The useful part of the marijuana plant is the female flower. Unless you are breeding the plants, and wanting seeds, you don’t need the male flowers.  Seed producers can actually process the seeds so that the plants only produce female flowers. This is good because the plant doesn’t have to put energy into producing the seeds (which takes away from the useful part of the flower). 

3-4 months will get you from seed to dried bud.

There are a number of factors that determine how long it takes. One factor is how long it takes the variety to bloom.  Some faster varieties take around 45 days from beginning to end of the blooming stage when you can harvest it. Others can take more than 75 days.  The other factor is how long you grow the plant before starting the blooming stage. That is determined by how big you want the plant to be, and how strong your light is. 

4 square feet is enough for a couple small to medium sized plants.

Obviously how much space you need is based on how many plants you are growing (check your legal status on what’s allowed). But also how large you let the plants get. We’ve had good results with 3 to 4 medium sized plants in a 4 foot by 4 foot space indoors.  One really large plant might require 4 foot by 4 foot just by itself. Smaller plants have been grown in smaller spaces, like inside a 2 foot by 3 foot cabinet (some ventilation is required so small cabinet growing is often less than ideal, but can be done).

If growing outside is legal in your area, you probably have to keep it out of view from the public, so consider privacy fencing (and quite possibly security fencing).

Growing inside will require at least some dedicated space.  Again, check your legal specifics, but you may need to have it in a locked room (as well as a locked storage place for your harvested bud).  And that leads us to…

Yes, they do. There are ways to handle the smell when growing inside, like venting or filtering. Outside the neighbors may smell it, depending on how close they are and how much you are growing.

Seedlings and small plants don’t generally smell much. But more mature plants, especially large plants can raise a stink.  Some varieties are worse than others, but expect that inside you’ll have to do something about the smell. Options include venting to the outside, carbon filters, ozone generators or a combination of these.

Growing outdoors takes care of itself, except that if you have neighbors close by and they’re down wind from your garden, they will smell it sooner or later, so it’s best to have a “good neighbor” relationship with them. If they are looking forward to you sharing your harvest with them, they’ll probably be OK with it.

It takes some time, but doing it our way (just the really important things), a couple plants really don’t need much time. A few minutes a couple times a week is usually enough for just a plant or two. 

We’ve spent a lot of time experimenting with different methods and procedures, adding in steps, removing steps…  There is a lot of advice on the internet about growing marijuana that suggests you do things that, in our experience just don’t matter much.  The “Pareto Principle” or “80/20 rule” suggests that 80% of the effects come from by 20% of the causes. What does this mean?  It means that there are a lot of things you can do while growing marijuana that will get you a little bit more bud.  But to get most of the bud (the 80%), you only need to do 20% of what many ppl will tell you you must do.  For example, you can check the acidity and fertilizer concentration of your plants daily, making adjustments each day.  But will your marijuana buds really be much bigger and better than if you just check and adjust those things once a week? In our experience the answer is “not much.”  You certainly can go “above and beyond” our recommended schedule, and do it more frequently. It won’t hurt, and it may help… a little. But in order to save time, effort and money, we’ve reduced things to what we feel is the optimal 80/20 level. This saves you time and money, and also simplifies things, which is important for getting started.  Why not start out simple? You can always experiment and increase your efforts, cost and complexity to see what works best for you as you gain experience.

See answers to “Doesn’t growing take a huge amount of time?” and replace “time” with “effort”.
See answers to “Doesn’t growing take a huge amount of time?” and replace “time” with “money”.
We define a step by step process for you to follow that eliminates the need for a green thumb.

People with “green thumbs” somehow know what to do and when to do it.  Our step by step process tells you what to do and when to do it.  As long as you can follow the steps and do them when our schedule tells you to, there’s very little that can go wrong to prevent you from growing great bud.

Using non-dirt methods of growing, for those who prefer to not get their hands quite so dirty.

Continue reading “Before you start Part 1: FAQ – Frequently Asked Questions”

Welcome!

Welcome to Modern Growing!  We will soon have blog posts here with valuable information to get you started if you’re new. Or to help you get better if you’re already growing!  Stay tuned!  Also contact us if you have requests for specific topics you’d like for us to discuss here.